|
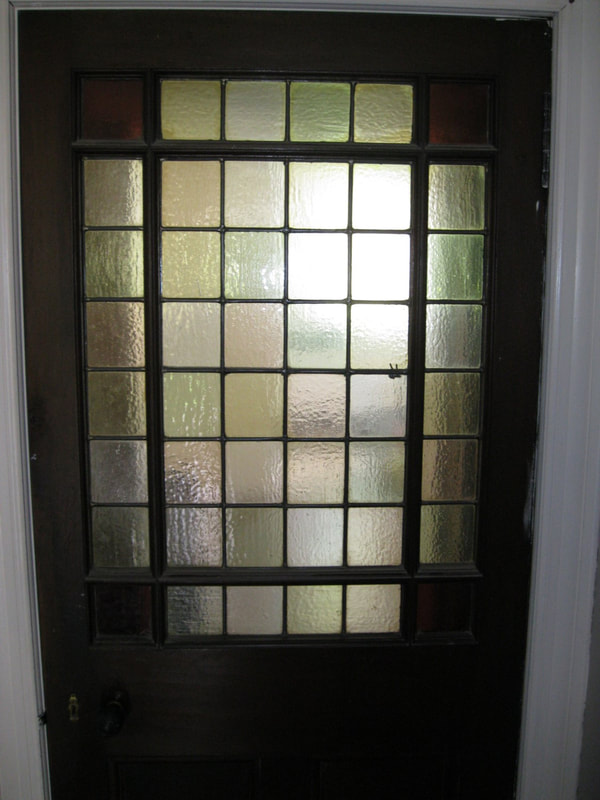
Our latest project is to build a panel to replace broken stained-glass in Linzi's front door. The commission for "Handa" is not merely to re-produce the original pattern of rectangles, but to create something new that is sympathetic to the setting and the colours of the other stained glass surrounding the door- and there is a lot. Linzi's request was to come up with a Charles Rennie Mackintosh (CRM) inspired design.
|
|
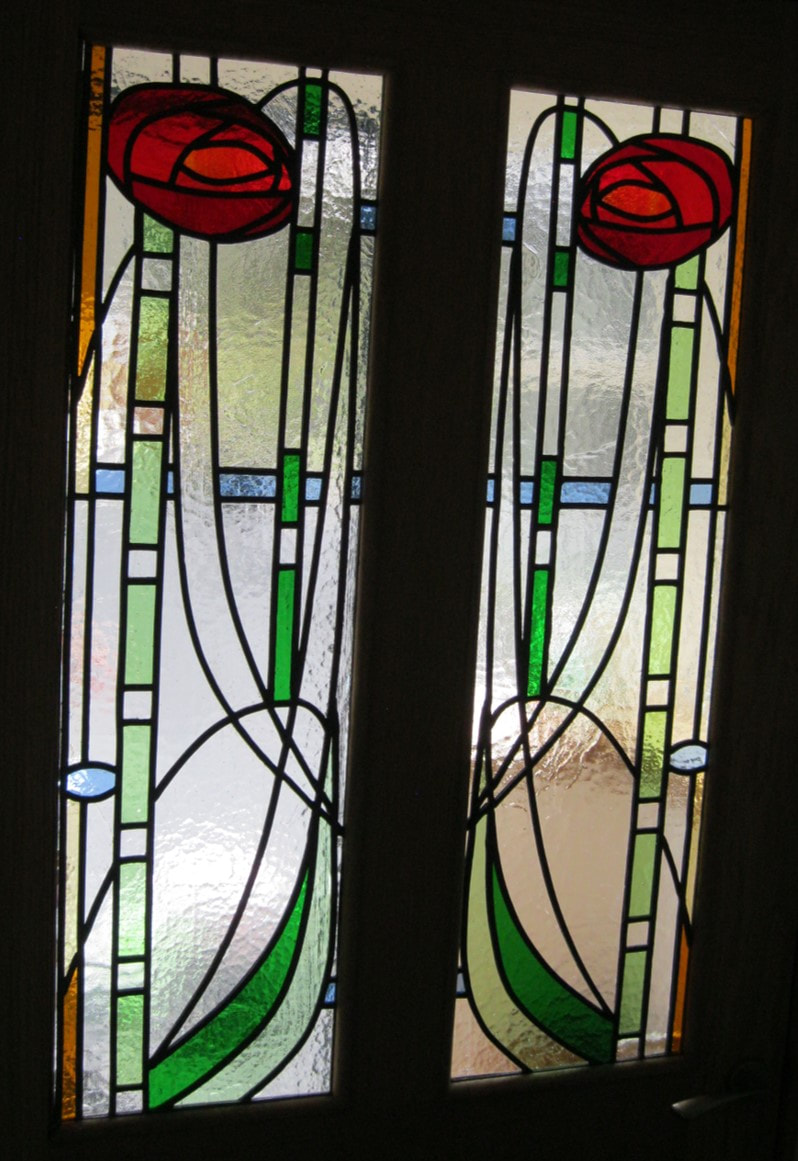
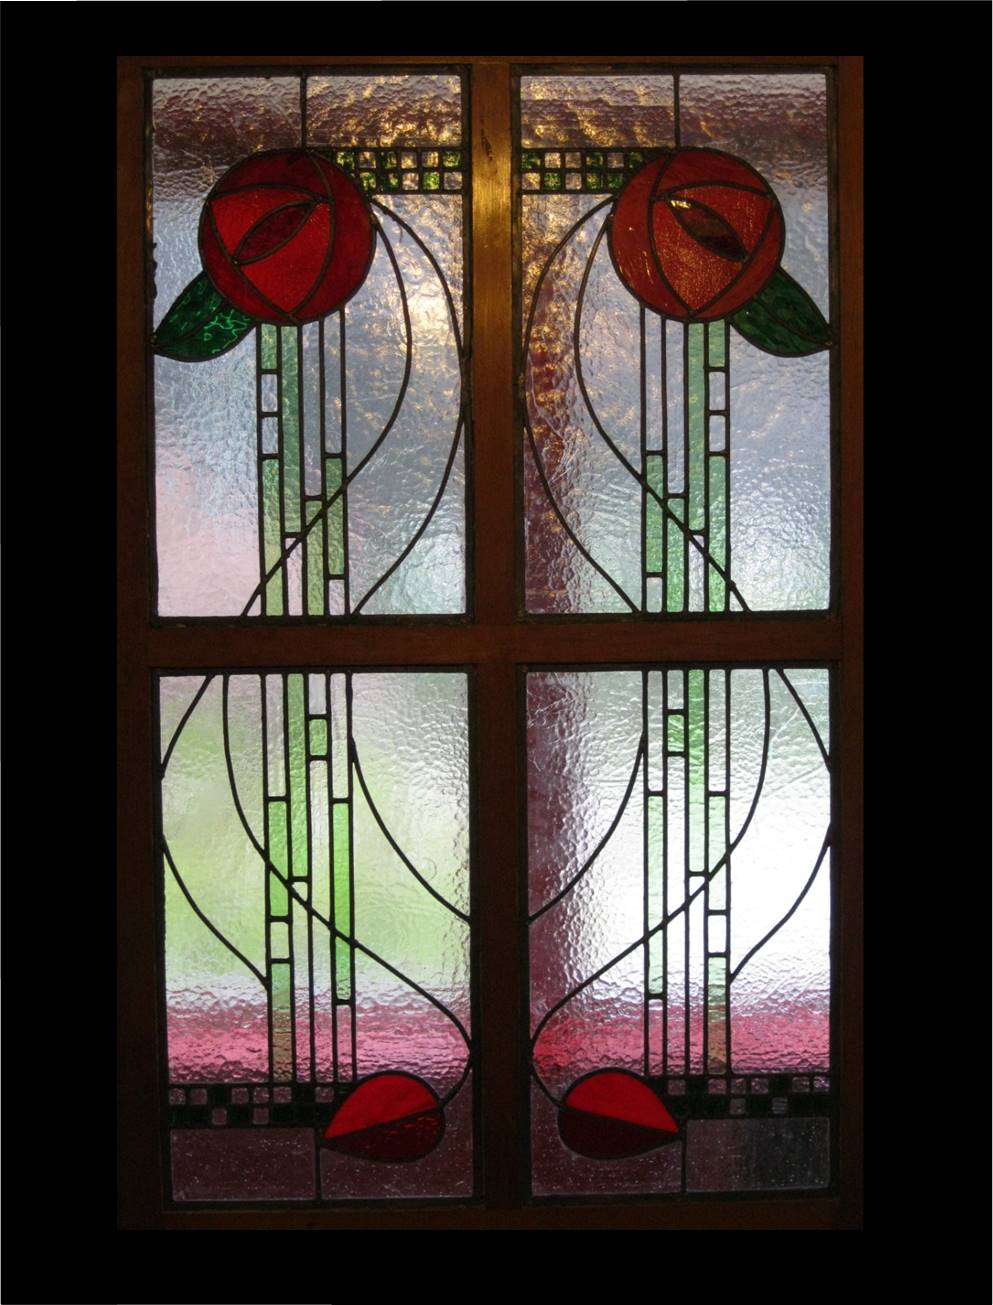
Pat has executed a couple of projects with the same basic inspiration and showing these to Linzi was part of the journey to the final choice for the panel. The journey started with the decision not to just replicate the original pattern. The request was for something pictorial - a stag was mentioned early on, along with some allusion to the island in the Orkneys that the house is named for. In going through some past projects with fish and birds as themes - we suggested a Puffin - Linzi latched on to the CRM theme and that was pretty much the end of the search.
|
|
|
The Basis of Design
|
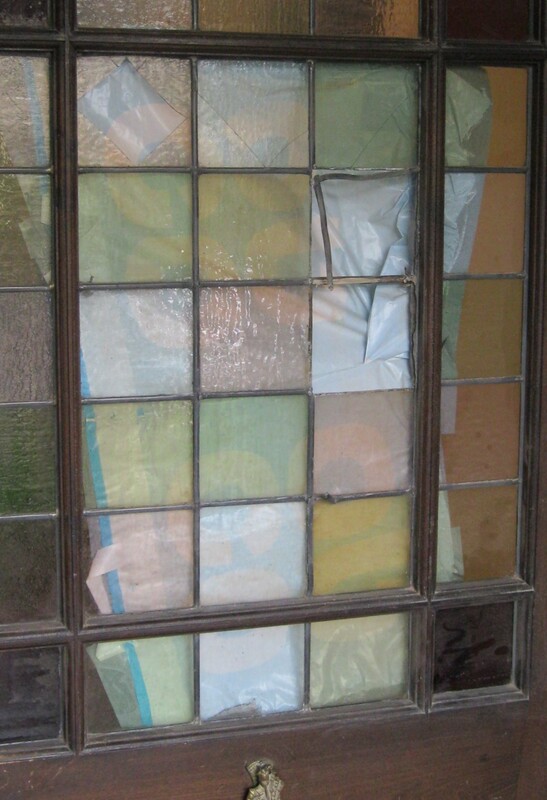
As mentioned already there is a lot of stained glass in the house that has survived the ravages of time. At left is a picture of the panel immediately to the left of the front door between the porch and hall. To the right, one of the doors leading off the hall. These other panels along with surviving side panels in the front door itself made the colour scheme for the design rather obvious - it needed to be sympathetic at least, even if exact matching were to prove impossible. The easiest way to kick this off was to salvage and re-use as much of the original glass as possible. Removal of the panel was therefore undertaken with great care and all the glass recovered with no further breakage. We also agreed that it would be good to incorporate elements of the design of the existing windows .
|
|
Glass salvage and cleaning
Of the fifteen near-square rectangles that made up the original panel, 2 were completely missing while three further panes were cracked and partly missing, leaving 10 intact. Some however, were precariously held and much of the original lead work was in a poor state. Trying to extract the panel in one piece would be to risk some of the panes coming out of their own volition and smashing. Accordingly, the first step was to secure all loose panes and pieces, with masking tape, taped to something solid. Then work moved to extracting the most damaged glass directly from the window. This left Pat with an approximate 2 x 5 panel still secured by the beading. The beading came out next, gently, intact, followed by the main reinforcement bar across one of the lead lines. This proved a challenge as it appeared to have been built into the door, but it was eventually removed without visible damage to the door. As the outermost lead was found to be held in place by panel pins protruding through from the other side of the frame, removing the last 5 x 2 panel was also problematic. In the end, Pat managed to remove the top two panes - one of which was already broken - and that allowed the rest of the lead and glass to be lifted out as one. In doing so, Pat narrowly avoided losing some of the glass to inadequate taping - he had taped horizontally, but had not anticipated the glass separating vertically - caught just in time!
Back to the studio with his booty, final dismantlement of the 4 x2 panel and other pieces came next, followed by cleaning off the dirt and grime along with the still adhering leaded glass cement. A three stage process has delivered 10 intact panes and a collection of smaller pieces.
Back to the studio with his booty, final dismantlement of the 4 x2 panel and other pieces came next, followed by cleaning off the dirt and grime along with the still adhering leaded glass cement. A three stage process has delivered 10 intact panes and a collection of smaller pieces.
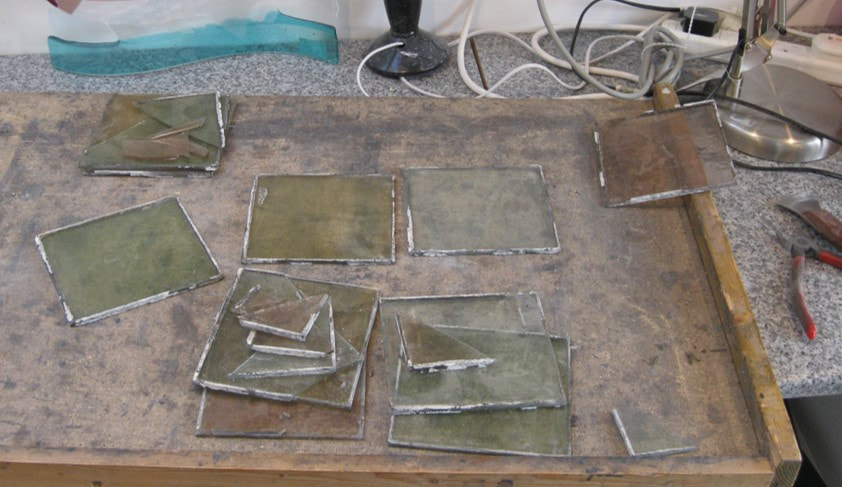
Glass extracted from the lead and ready for cleaning.
|
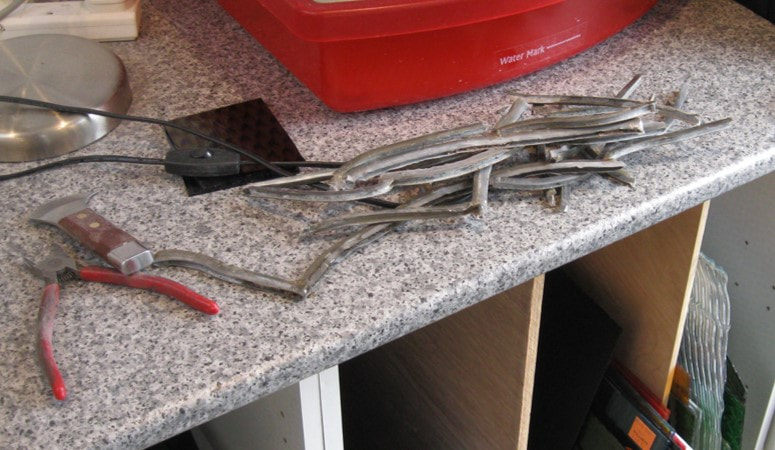
The scrap lead and the tools of the trade - lead knife and snips.
|
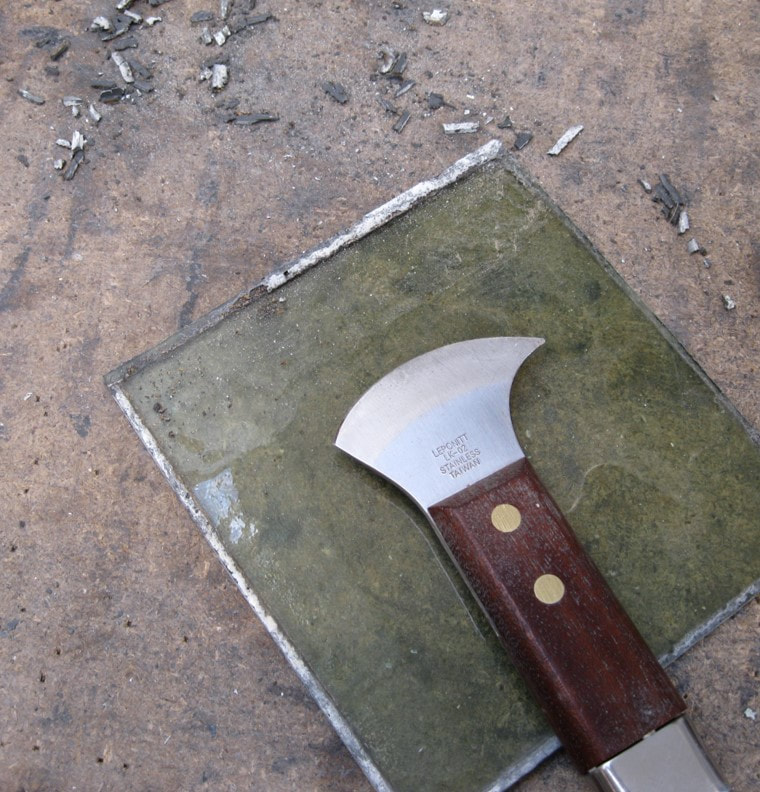
Commencing on one of the intact pieces. The lead knife is a useful tool in intial mechanical removal of the cement - the debris at the top of the picture.
|
After the mechanical stage was complete, the next step was to soften the remaining cement by leaving overnight in a dilute solution of hot vinegar. The softened cement was then removed with a scothbrite pad and fingernails.... The final stage was to soak in a hot solution of Oxy-Action to get rid of any remnant staining and grease. What emerged were, to Pat's surprise, 4 different coloured glasses and some colourless glass that had not been recognised as present when in situ.

An example of before and after for the mechanical stage.
|
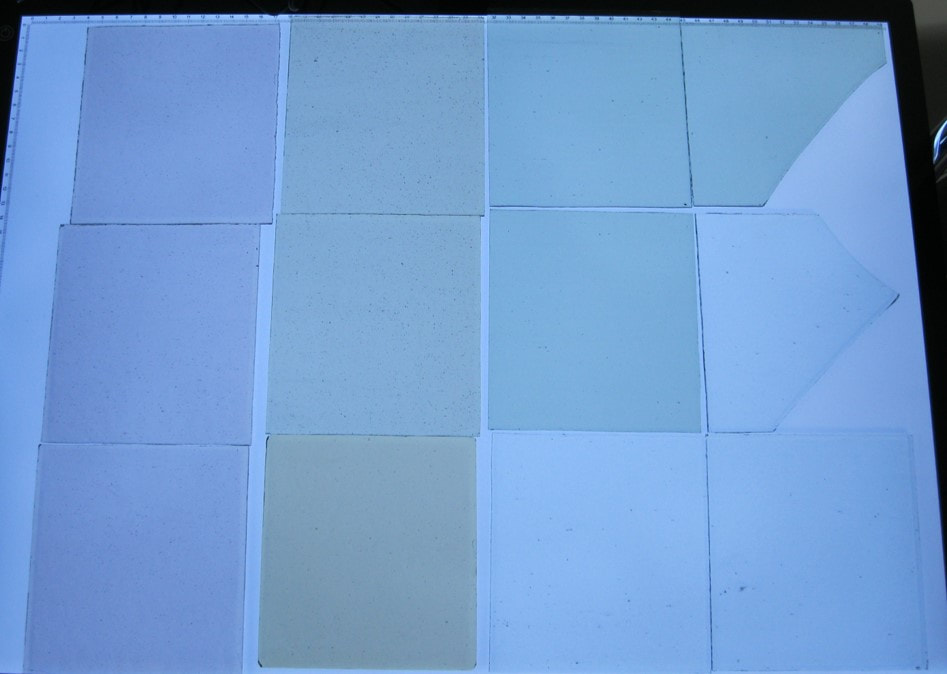
Some of the clean glass on the light table
|
Design - the next steps ...
Working with the elements mentioned above Pat has come up with an initial design for discussion which incorporate the two part border of the panel to the left of the door and a central panel with 2 CRM inspired roses and other distinctive CRM elements. The background glass is proposed to be composed of colourless glass, near-square rectangles, as in the original design, but this time in a six x four pattern. The intention is to use the recovered coloured glass for much of the CRM elements. Some modern glass will be required - particularly for the border, but also for the roses and leaves. Once the design line work and principles are agreed, the next step will be to convert to a coloured version for final approval. The the search will be on for modern textured glass that will match or at least not violently differ from the salvaged glass. Pat will aim to find a close tonal and textural match to the glass in the "model" border to the left for his border and the dark pink glass will form one of the glasses for the roses.
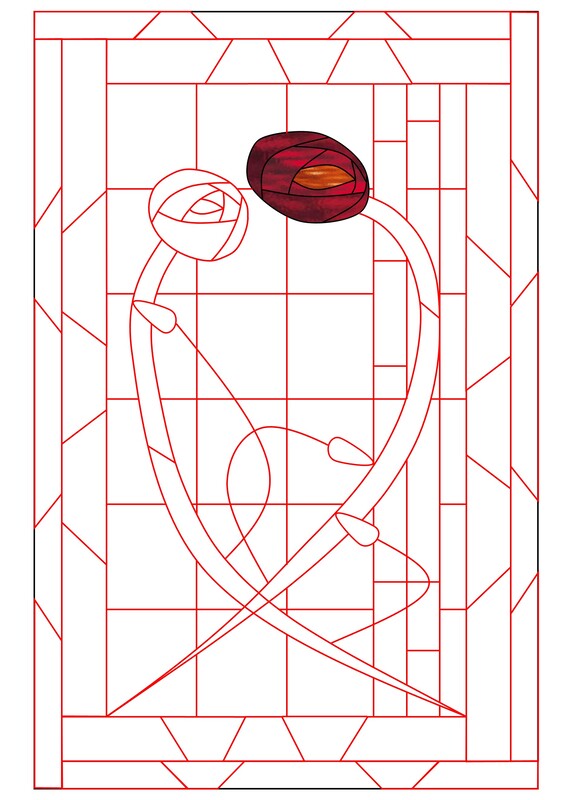
Design one for discussion....
Linzi was happy with the basic line work design, so after some discussion about how and how much of the original glass would be incorporated into the design, Pat moved to stage 2 and produced a block colour impression, which has also been agreed.
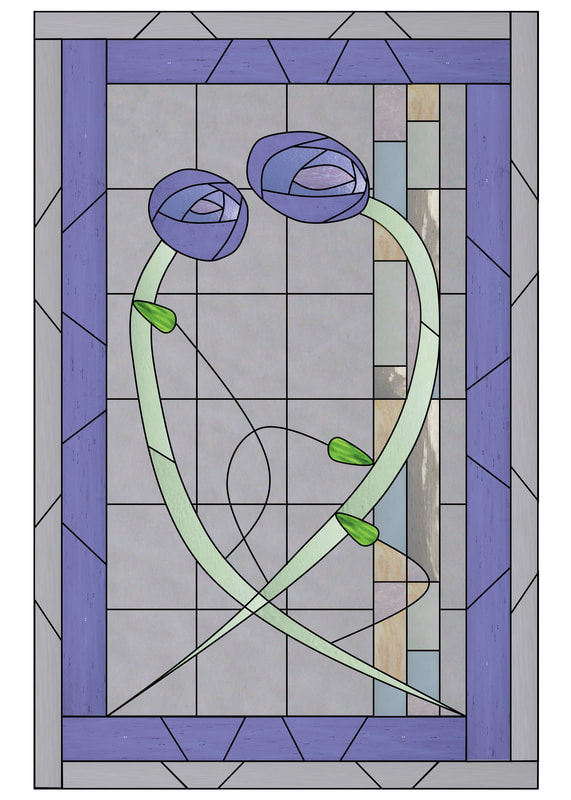
Unfortunately, as always, though the "colours" are based on photographs of actual glasses, they do not faithfully represent the real appearance of the glass. In this case all of the salvaged glasses appeared to b shads of light blue. The glass that appears grey is colourless and all the rest in the picture above are merely indicative.
Progress Reports
Progress on the project will be reported below via a progressively growing slide show. The drawing has gone to print, research continues on finding the right glass for the purple border and cutting glass has commenced.